Hardware
On the hardware side, I already had a bit of equipment from my last attempts are recording lectures. I wanted high enough sound quality without having to buy too much stuff. I settled on a reasonably nice USB mic (see below) and used my NIU-issued iPad Pro.
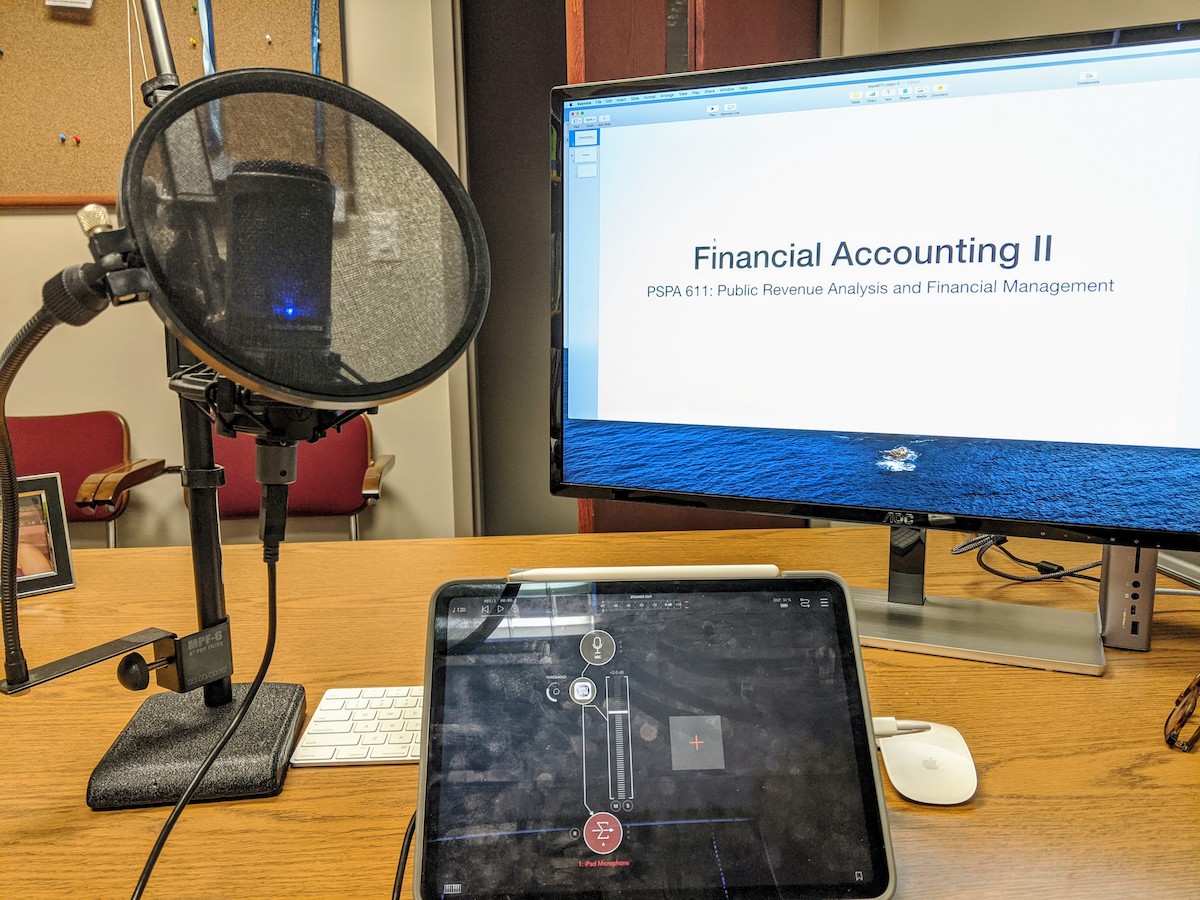
- audio-technica AT2020USB+ Cardioid Condenser USB Microphone, though any USB mic will work
- iPad Pro
- An Apple Pencil (makes my editing life much better)
- A USB-A to USB-C adapter
- Various quality of life enhancements that are not required but very nice to have (a compatible shock mount, a heavy mic stand, a good pair of monitor headphones)
Most of this isn’t strictly necessary. Any USB mic will work. The Apple Pencil is a quality of life thing as is many of the other desktop accessories. The minimum required hardware is a mic, USB adapter, and an iPad.
Software
Hardware is just a means to an end. I still have to talk into a microphone. There are plenty of ways to make this work on an iPad. Garage Band (pre-packaged on all(?) iOS devices) is a completely free way to do this, but it has some quirks that I found distasteful. Mainly, I couldn’t find an easy way to see how long I had recorded in real time. Searching for alternatives, I stumbled on Charlie Sorrel’s three-part, “How to record podcasts on iPad” on Cult of Mac and pretty much followed the formula.
This required some specific paid software. I previous recorded/edited on a Mac using Audacity. It’s free, easy to use, and cross-platform if that’s important. Unfortunately, it’s not so cross-platform that I can use it on an iOS device. So I whipped out my credit card and headed to iTunes. A lot of these claim to be “free,” but I found the free versions are quite limited given what I wanted to do so I paid up. It appears many of these are small developers so I am more than happy to throw some cash their way for quality products.
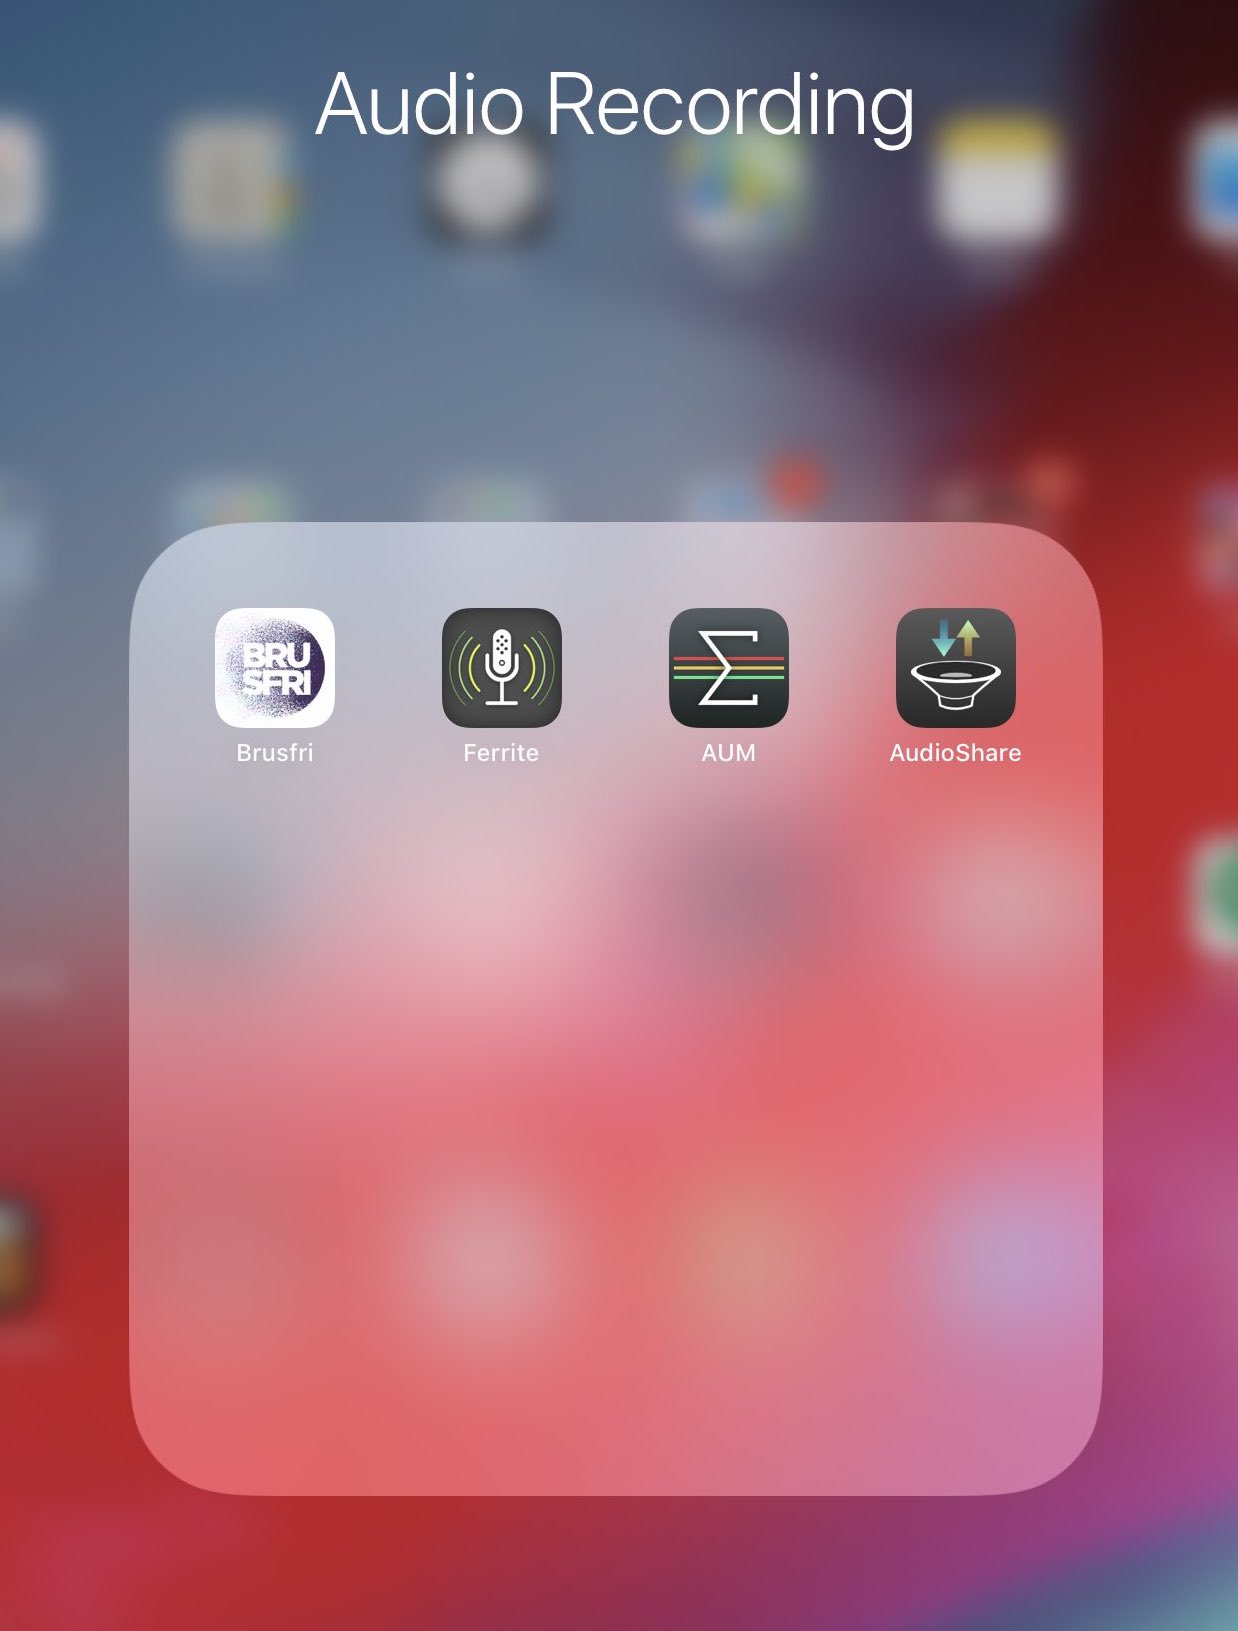
- AUM – Audio Mixer – for recording
- A noise reducing tool (I use Brusfri that is compatible on its own and in-line with AUM)
- AudioShare – audio file management plus some useful audio tools
- Editing software (Ferrite Recording Studio)
AUM serves as my audio mixer and recording device (it can handle a number of audio inputs which is a nice perk should I ever decide to record with a partner) and I use Brusfri in-line as a noise reduction tool (my office is right below the main HVAC for the building and I didn’t want that hum in the recording). An added benefit of this set up is that I can use it as the voice over for screen captured video and voice over powerpoint. See Teddy Svoronos at HKS for more on that. At this point, I talk into the microphone.
Editing is next. I use AudioShare mostly to level out any extreme peaks in the recording (it’s also integrated with AUM so it becomes very easy to categorize recordings) and then import it into Ferrite for editing. I mostly edit out the dead air and umms, but I sometimes get rid of whole passages that I don’t think hit right. I could insert new content here as well. I mostly follow Charlie’s method and the Apple Pencil is great here. Ferrite allows you to assign different actions to the pencil vs your finger. I have set up a left swipe of the pencil to select and delete. This makes it very simple to listen along and quickly edit out stuff.
All that’s left is to export to MP3 and upload to Blackboard. It seems like a lot, but I’ve found after the first one the process goes very quickly.
And that’s it! Recording high quality audio lectures with a small and very portable setup.